Soil Propagation
Monstera plants, particularly Monstera deliciosa is the most popular indoor plant among the other indoor plants because of their large leaves and unique natural splits made on them according to time. The best thing about Monsteras is that they are easy to propagate and allowing you to grow new plants from an existing one while many people start propagation in water propagating Monstera directly in soil is an effective method that encourages strong root development from the beginning.
What is Monstera Propagation?
It is the process of creating a new plant from an old plant. You can also propagate a monstera plant. In Monstera this is done using stem cuttings that contain at least one node. A node is the small bump on the stem where new leaves, aerial roots start developing. Without a node a cutting cannot produce a healthy root system and it is useless.
When propagated directly in soil the cutting develops roots in the same growing medium where it will continue to live reducing transplant shock and encouraging natural growth.
Benefits of Soil Propagation
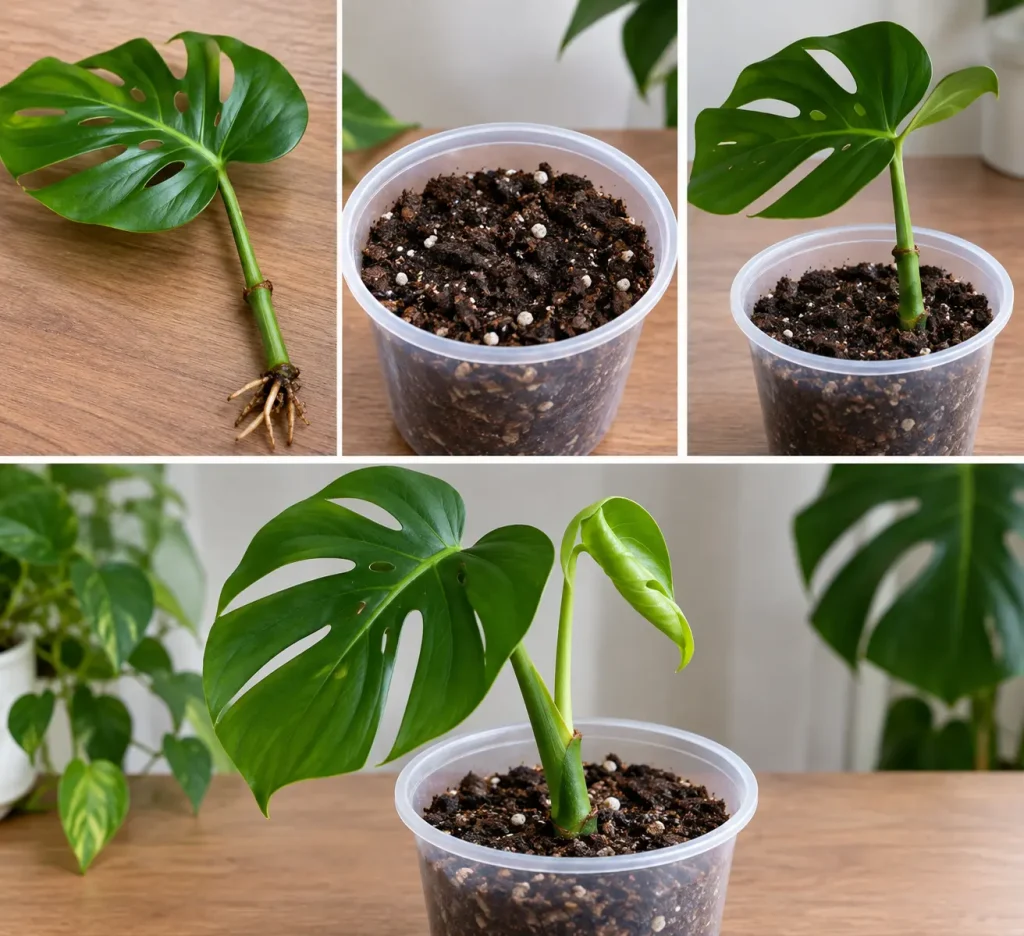
Propagating Monstera in soil offers many advantages over water propagation. First of all the roots adapt immediately to soil conditions and eliminating the need to transition from water roots to soil roots later. This often results in healthier and strong root system. Another benefit of soil propagation is less care. Unlike water propagation there is no need to change water every few days or worry about algae growth. Soil also provides better support for the cutting and help it remain upright.
Additionally, soil propagation closely mimics the plant’s natural growing environment byu making it a preferred method for many experienced gardeners.
Materials Required
Before starting collect the following materials:
* Healthy Monstera plant
* Sterilized pruning shears or scissors
* Small pot with drainage holes
* Well draining potting mix
* Perlite or orchid bark
* Watering can
* Clear plastic bag
Using clean tools helps to prevent the cutting from disease and infection while making fresh cuts.
Step by Step Propagation Process
Step 1: Choose a Healthy Stem
Select a healthy monstera cutting from a healthy monstera plant. Again you have to ideally that the cutting should have one or two leaves and at least one node. If an aerial root is already growing from the node the process of rooting may occur even faster.
Step 2: Make the Cut
Use sharp scissor or other material to made a cut. Made a cut about half an inch below the selected node. Ensure the cutting includes the node because roots will start begin from this point.
Step 3: Prepare the Soil
Fill a small nursery pot with a loose and well draining soil mix. A combination of indoor potting soil, perlite and orchid bark works well because it provides both moisture retention and excellent drainage.
Avoid heavy garden soil which can remain too wet and cause the cutting to rot.
Step 4: Plant the Cutting
Insert the node into the soil while keeping the leaves above the surface. Politely press the soil around the stem so the cutting stands upright without being compressed too tightly.
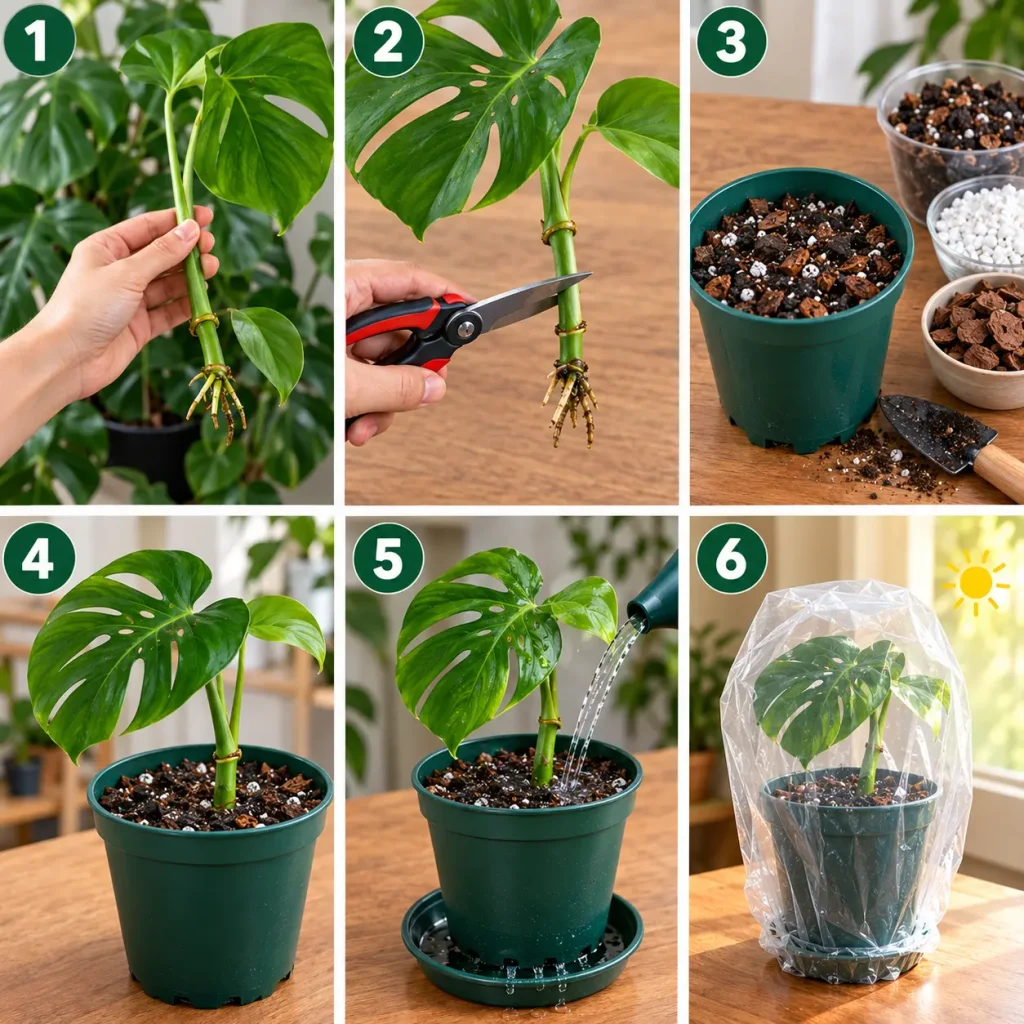
Step 5: Water Thoroughly
Water the soil until excess water drain from the bottom of the pot. The soil should be evenly moist but never soggy. Proper drainage is essential for preventing root rot.
Step 6: Provide Ideal Growing Conditions
Place the pot in a warm location where bright indirect sunlight can reaches easily. Avoid direct afternoon sunlight because it can stress or burn the cutting before roots have fully developed. Maintaining humidity, ideally between 60% and 80% can helps to reduce moisture loss from the leaves while new roots form. If your home is dry covering the pot with a clear plastic bag.
Caring for the Cutting
During the growth of rooting period you have to keep the soil consistently moist without overwatering. Check the top inch of soil regularly by finger touch. If it begins to dry out water it lightly. Do not fertilize immediately after planting wait until new growth appears which usually indicates that the root system has become established successfully. Once new leaves made, begin feeding with a balanced liquid houseplant fertilizer at half strength every four to six weeks during the growing season.
Root development generally takes between four and eight weeks, depending on temperature, humidity, health of the cutting and the other basic needs of a cutting.
Signs of Successful Propagation
A successfully propagated Monstera will shows you some signs:
* New leaf growth appears.
* The cutting remains firm and upright.
* Gentle resistance is felt.
* Leaves stay green and healthy.
These signs indicate that roots have formed and the plant is growing actively .
Common Problems
Although Monstera propagation is easy for beginners but also has few challenges.
Stem Rot:
Usually caused by over watering or poorly draining soil. Remove affected portions and start with a fresh cutting.
Yellow Leaves:
Often result from overwatering or insufficient light. Adjust watering habits and move the plant to a brighter location with indirect sunlight.
Wilting Leaves:
This may occur due to underwatering, low humidity, or the cutting not yet having developed roots. Increase humidity and maintain even soil moisture if needed.
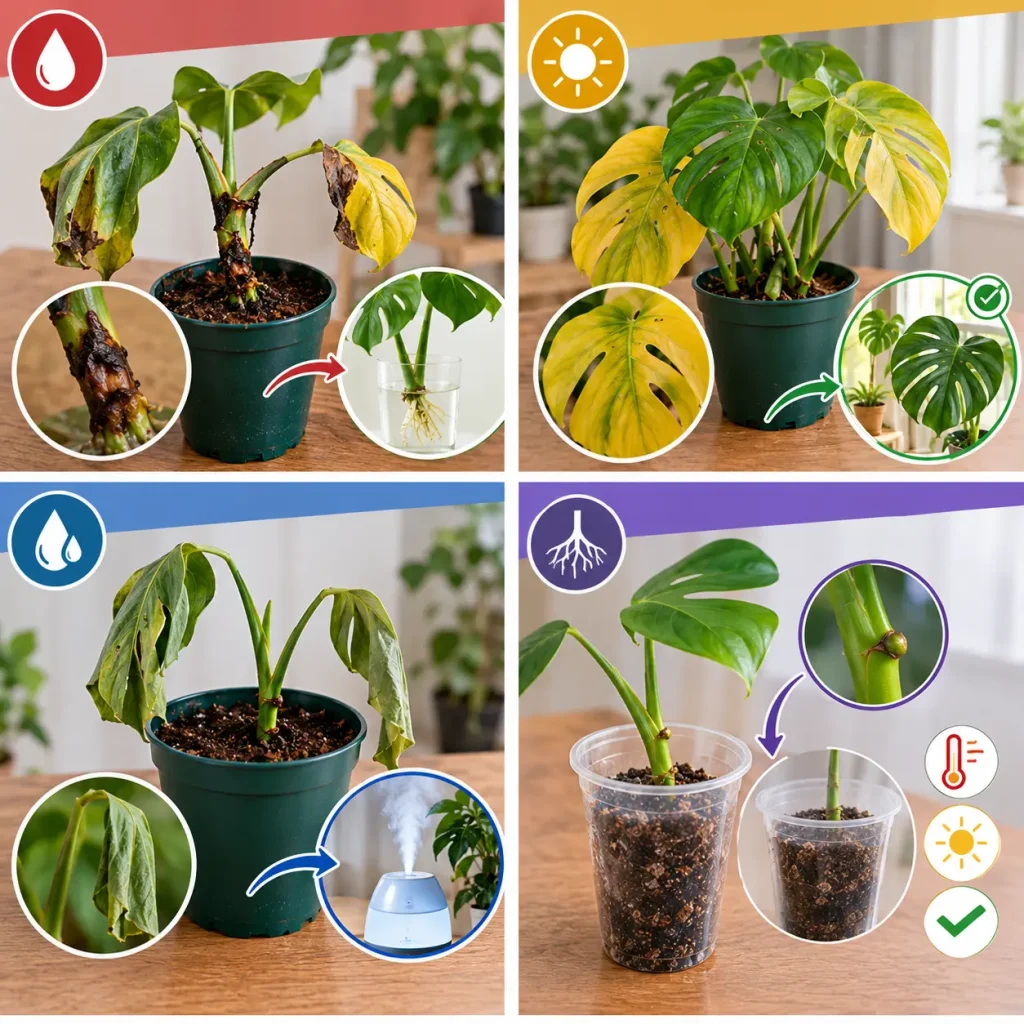
No Root Growth:
If several weeks pass without progress, ensure the cutting contains a node and is receiving adequate warmth and indirect light.
Tips for Better Success
Choose healthy plant free from pests and diseases. Always clean the tools before making cuts. Use pots with drainage holes helps for removing the extra water. Don’t place the newly propagated cuttings in direct sunlight because it can stops the growth of cutting. Maintaining consistent warmth between 20°C and 28°C encourages faster rooting.
Patience is very important because some cuttings root quickly while others require additional time depending on environmental conditions.
Conclusion
It is an easy process of propagating monstera in a soil. You can expend your monstera collection by propagating it. You just have to select a healthy cutting having at least one node on it, planting it in well draining soil and providing consistent moisture, warmth and indirect light you can successfully grow a new healthy Monstera plant. Although rooting takes several weeks, the reward is a healthy plant with roots already adapted to soil, making long term care easier. With proper attention soil propagation can become one of the most reliable methods for growing beautiful Monsteras at home.
FAQs
Can I propagate a Monstera directly in soil?
Yes. Monstera can be propagated directly in soil as long as the cutting has at least one healthy node. Plant the node in a well-draining potting mix, keep the soil slightly moist, and place it in bright, indirect light until new growth appears.
How long does it take for a Monstera cutting to root in soil?
Most Monstera cuttings develop roots within 3–6 weeks. The exact timing depends on factors such as temperature, humidity, light, and the overall health of the cutting.
What type of soil is best for propagating Monstera?
A light, well-draining mix works best. A blend of potting soil, perlite, and orchid bark provides excellent aeration while retaining enough moisture to support root development.
How often should I water a Monstera cutting in soil?
Water when the top inch (2–3 cm) of soil feels slightly dry. Keep the soil evenly moist but never soggy, as overwatering can lead to root rot.
Does a Monstera cutting need a node to grow in soil?
Yes. A node is essential because it is where new roots and shoots develop. A leaf without a node may stay green for a while but will not produce a new plant.